Monday, November 26, 2012

Home Made ~ Meat Spring Rolls - Kerala Style


spring roll meat puffs pattice kerala beef puffs

                                             
The credit for this recipe goes to my sister's mom-in-law (Mary Mathew). The recipe makes wonderful use of a traditional Pallappam Chatti. I have personalized the recipe with my own additions. It tastes awesome when eaten immediately :-)
Ingredients

1) All purpose flour -2 cups
2) Salt -per taste
3) 1-2 eggs
4) Water - to achieve medium thin consistency. 
5) Oil to fry (extra virgin coconut oil,used in this case)

6) Filling of choice : Prepare any filling that you would use for Puffs/ Patties/ Spring rolls. I used a Beef filling with potatoes and chickpeas.  Any combination of sauteed julienne vegetables (cabbage , carrots -thinly cut -would work well as well)

Method:
1) First prepare the filling and keep it ready. This can be prepared per taste. I prepared a beef fry (olarthiyade) and ground it with a baked potato and cooked chick peas. Grind ingredients as desired.


Filling


 2) Mix together flour , eggs, salt and water to a thin consistency.


3) Preheat a Pallappam chatti (very popular in Kerala, India). If you do not have one, use a frying pan that is slightly deep. Pour one spoon of the batter into the center.


4) Swirl the pan/ chatti just like a Pallappam (basically hold the handles and rotate the pan clockwise) The batter will spread to form a thin pancake.


5) When the pancake is partially cooked flip it over and fill some filling. This can be done in a plate as well.


6) Fold the ends of the pancake to make a spring roll / puff as shown below.

7) Prepare additional rolls in the same mannerand keep them ready


8) Either deep fry the rolls (authentic spring rolls) or bake them in the oven (healthy version)


9) Your delicious spring rolls are ready to relish ..


Friday, November 23, 2012

Butternut Squash Dessert


Here is a recipe of a Special Thanksgiving dessert. This is the perfect season for butternut squash. This same recipe can be used on a pie shell as well.  


Ingredients
Butternut Squash (Boiled and mashed - 3 cups)
Low fat Condensed milk (1/2 can)
3 Eggs  (yolk optional)
Flour ( 2-3 tablespoons)
Butter / Olive oil - 1/2 cup
Brown Sugar -1.5 cups
Regular sugar 1/2 cup
Vanilla essence -2 tsp
Pinch of salt
Nutmeg powder (per taste - about 1/2 tsp)
Cinnamon powder (per taste - about 1/2 tsp)
Cranberries / Rice-Crispies for decoration.

Method:
1) Cream together  softened butter and sugar and beat together. Beat eggs and add to mixture.
2) Add condensed milk, flour,vanilla essence and mix.
3) Peel butternut squash and cut into pieces. Pressure cook butternut squash with little water.
4) Drain the water and blend it into a puree when cool. Picture below shows puree added to the mixture prepared in steps 1 and 2.


5) Mix ingredients, add nutmeg powder, salt and cinnamon powder. The picture below shows the final mixture. The butternut squash had an exceptionally brilliant hue this time. Usually it is slightly lighter in color but tastes just as good.


6) Lightly grease a Pan and pour this mixture into it. Lightly sprinkle some more nutmeg powder on the surface.
7) Preheat oven to 350 degrees and bake mixture for about 45 minutes or until a fork comes out clean from the center.
8) Remove from oven. Spread cranberries and rice-crispies for decoration. Note: Rice crispies should be added just before serving as they may get soggy if added earlier.
9) Cut into pieces and serve.


Friday, October 26, 2012

Few more cakes

Just found a few other pics that I didn't post as yet.. Here is a Disney Princess cake..

Disney Princess Cake


Pretty simple and straightforward ..  The castle is made from 2 layer cakes. I used two types of ice-cream cones for the castle. The regular cones as well as ice-cream cups. Dip the cones in sugar syrup and then coat them with purple sugar. It is easier than it looks :) 

The princesses are toppers from a Cake Store/party store. the rest is simple star decoration.

Another Birthday cake from a few years ago for Jose's birthday .. The cake stands are available in Micheals to help with the two layered cakes.


The flowers are made using a decoration tip. The writing is with red gel.


Wednesday, October 24, 2012

Spicy Apple drink

After focus on food for kids, turning my attention to something different ..  A Nice Apple drink with a dash of spice, perfect for a tired evening. It does not contain ice so it works well in Fall weather as well as a nice day like today. Don't miss the carrot hearts ... :-)


Apple Slices -2 apples
Baby Carrots - 10 -12
Small extra spicy chilly
Ginger Slices -3 to 4 (depends on taste)
1 spoon flaxmeal ( lowers cholesterol / high fiber)


1 glass fat free milk
3-4 tablespoons yoghurt


Beat all ingredients in a blender  with a dash of salt. Pour into a glass. Decorate and Serve (Easy and delicious) I cut out carrots in the shape of hearts. In the pic below they are resting on a slice of apple through which I pierced the umbrella cocktail decoration.


Wednesday, October 10, 2012

Homemade Pizza ~ Yum; Healthy Toppings ~ Priceless

If you ask a group of kids what their favorite food is, chances are high that a lot of them would say PIZZA. How convenient to pick up the phone and 'Order Pizza' for kids or adults at any party. Last Christmas thanks to a game of Secret Santa, I was blessed with a Pizza Stone. Needless to say, the experimentation began. My hubby's teeth are still in reasonable shape but I have finally arrived at the recipe which works best and I am pleased to share that with you all. Happy Experimenting ! ..Btw the Pizza Stone is not mandatory, it just adds flavor. It is available on sale at Macy's occassionally. 
Home made Pizza
Ingredients
Yeast (1 pkt)
Flour 3-4 cups
Olive oil -2 tablespoons
Salt per taste
Sugar -1 tsp
1 Egg (optional)
Cornmeal (1 tblsp)
Tomato Sauce - Pasta/Pizza sauce or homemade (Tomatoes, veggies, spices, nuts)
Toppings of your choice: Onions, Boneless cooked chicken(salt /lime/spices), Pineapple, Mozarella cheese. (Other choices range from Brocolli, Mushroom, Spinach, Bell Peppers, (If you are looking for protein sources then  meat, All natural hotdogs, sausages, pepperonni etc. )
1. First mix 2 and half tsp of Yeast (1 small packet) with 1 tsp of sugar in a bowl and add 1 cup of lukewarm water to it. After 15 mins the yeast will rise as shown below.


2. Add 2 cups of all-purpose flour (you can chose organic/ unbleached etc) and mix it. Add salt per taste (about 1 small tsp) and mix it.


3. Add 1 egg to the mixture above. (egg is optional -it makes the bread softer, skip the yolk if you wish to) . Add another 1-2 cups of flour , 2 tablespoons of olive oil and mix. Add water if necessary to get a medium consistency.


4. Cover with a moist cloth and keep it for 2 hours. The dough will rise very nicely. Mix it again and then keep it for another 30 minutes.

5. Prep your toppings. This is the time you have a chance to pretty much chose anything you or your kids love. Shown below are onions, sliced boneless chicken , pineapple and cubed mozarella cheese.


6. Tomato sauce :- This can be made in several ways. You can modify pasta/pizza sauce, or you can make your own depending on time. Feel free with experimenting with the ingredients like Parsley, Mushrooms, Fried Onions, Basil in the sauce. Remember to peel the skin of the tomatoes after boiling tomatoes in water and before grinding it. For this pizza I added cashewnuts and pistas because my kids don't like nuts a lot, so this is one way of getting them to eat it.


7. Sprinkle  corn meal on the pizza stone. Do not substitute with flour (I tried it). Flour works well with cakes but with pizza, corn meal helps it to separate from the stone. It also adds a little flavor.


7. Roll the dough to almost fill the pizza stone. Fold the edges slightly upwards so it forms a rim.


9. Spread the tomato sauce, add cheese (shredded mozarella works well) and add all your favorite toppings.  As mentioned above, this pizza has cooked boneless chicken (sauteed with lime, salt), pineapple, onions and cubed mozeralla cheese.


10. Bake in a pre-heated oven at 350 degrees for about 35-40 minutes until well done.
red onions chicken pineapple
11. Keep to cool for 10 minutes before slicing it.
Note : Experiment with other toppings of your choice - Spinach, Mushrooms, Brocolli etc. You can also add veggies that children do not generally eat in the tomato sauce mix.

Pictured below is another Pizza made with the all-time favorite pepperonni, (without BHT), brocolli, mushroom ,shredded mozarella and onions.


Hope you liked the recipe. Please leave your comments or like the facebook page YayLearner-Facebook if you liked this recipe. 

Friday, September 21, 2012

Soccer Game and Naadan Cake

Last week, we had our St Jude soccer tournament. Along with esteemed teams i.e  Avial United, SRA quotation, Herndon Heroes and Ashlee Kidilans, we had a wonderful refreshment stall full of culinary delights.

Here is the recipe for the Naadan cake that was part of the stall. This cake is also known as Christmas cake, Caramel cake and perhaps by several other names. Hope you enjoy baking this one. They say in baking you must follow exact instructions. However , I feel it is okay to experiment around until you reach the best recipe that suits your own taste.

This recipe has a lot of rogue ingredients.. butter, eggs etc. However, this is still considered "healthy" as opposed to store bought cakes which have artificial ingredients. Children and adults who can afford more calories, can enjoy the goodness of natural home made cake. Adults who can't afford more calories are advised to eat with restraint :-) ... OR perhaps skip your next meal or work out to burn the calories.

Naadan Cake
Ingredients
2.5 cups sugar (regular, not confectioners as it has corn starch)
2.5 cups regular all purpose flour (you can pick organic/ unbleached depending on choice)
5-6 eggs (organic if you wish, also skip the yolks if you wish ,but add a couple of extra whites)
Butter 2.25 cups ( can substitute partly with veg oil, or experiment by reducing the quantity)
Vanilla essence 2 tsp
Baking Soda 2.5 tsp
Nutmeg -per taste
Salt per taste - ONLY if the butter is unsalted butter.
Powdered cardamom (optional)


Steps

1) Keep the butter out of the refrigerator so it is a little soft when you start preparing the cake. Melting in the microwave does not have the same effect.

2) Sieve the flour and baking soda, cover it & keep it aside . Sieving is not necessary in the U.S but it helps the flour mix well with the baking soda.


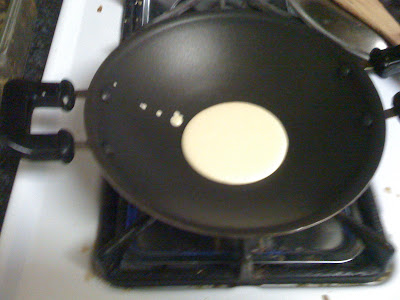
3) Prepare the caramel for the cake. Take 4-5 spoons of sugar and melt it in a saucepan.


4) Keep stirring the sugar as it further melts.


5) Once the sugar has fully melted and is golden brown in color, add half a glass of hot water. Keep stirring so no lumps are formed. This can be challenging.  The final liquid should look like the picture below. Keep it aside to cool.


6) Powder the sugar in a mixie. Do not use confectioners sugar instead as it contains corn starch.


7) Mix the butter with this powdered sugar really well. Electric mixers are the best choice. You can spend some extra time mixing these 2 ingredients.


8) Separate the egg yolks and whites and beat the whites really well. Having a stand-up electric mixer really helps. It does seems like a big investment but it has helped me make Pizza doughs and is generally very handy.


9) When the egg white foams lift it off from the remaining egg whites and add it to the butter/sugar combination. Then beat the rest of the whites .


10) Along with the butter/sugar combination add the egg white foam, then add part of the flour/baking soda combination and mix.


11) Repeat the steps of combining the ingredients until they are well combined.  Also add the yolks if you wish to do so. Add nutmeg and optional powdered cardamom. Also add a pinch of salt -if the butter was unsalted.

12) Add the vanilla essence and the caramel to the cake and mix it at medium to low speed for a couple of minutes.  At this point it may seem like the dough has curdled which is normal.

13) Grease the pan and lightly flour it. Preheat the oven at 350 degrees and bake for about 30-40 minutes until a fork comes out clean from the centre.


14) If you are baking a larger cake, you can reduce the temperature to about 325 degrees towards the end and add additional minutes.

15) I do not have a picture of the big cake above once it was baked, but here is a picture of another cake that was made with the same recipe. Hope you enjoyed this tour :-)


naadan cake kerala cake christmas caramel golden cake


      Please leave your comments or like the facebook page  YayLearner-Facebook  if you liked this recipe.

Thursday, September 13, 2012

Can I eat that Piece of Art? ~ A treat for the eye, a delight for the appetite.

  Can you eat the decorations? Absolutely !!


Is cake decoration a skill that you have experimented with?   Have you wondered how easy cake decoration could be? If you have a genuine interest in cake decoration and are ready to put a little bit of effort, it can be fairly easy.

What do you need first? Well to begin with you need a smooth surface cake. Your cake can be from a recipe or a cake mix. I am sure you all grease the cake pan first before pouring in the batter, but did you know you must lightly flour the pan after you grease the bottom? Also, do you know an easy trick to get it out smoothly? When the cake is done, let it remain in the pan for 10 minutes. Any time sooner, the cake is going to be too hot.  More importantly, if you leave it for longer, a condensation effect takes place, which means the cake sticks to the pan. Then it could be a struggle to get out. If that does happen, warm the cake slightly again and then try to get it out. A smooth surface means half your work is done.

Are you ready to start icing now?  Butter Cream icing is fairly popular and is made with butter and confectioners’ sugar. In hot temperatures the icing can melt fairly quickly. Commercial cakes use regular shortening with sugar to make the icing, but that doesn’t taste very good. A good compromise is to make your icing with half butter and half butter flavored shortening. Don’t forget to add a tiny pinch of salt to balance the sugary taste. This icing can be for the base on the cake. For decorations you can make it from this icing by adding your own colors or buy some tubes from the store for specific colors.

Icing for covering the cake is usually thinner than that used for decorations. Ice the cake using a spatula. Does it look smudgy? There is an easy solution to that as well. Clean your spatula once you are done and warm the metal edge. Then run it across the surface of the cake. The heat causes the butter icing to melt slightly creating a very smooth flat surface ready for you to decorate.

Let us assume you are not a great artist and fear having to draw free-hand on the cake.  Transferring a complicated design to a cake isn’t as hard as you think it is. Pick any picture you would like to draw on your cake. Lay a roll of parchment paper on it. Buy some Piping Gel which is available in the cake aisle of craft stores. Fill some gel in a bottom corner of a Ziploc and fold it like a cone. Then cut a tiny hole on the corner bottom to make your own gel dispenser.  Trace the outlines of your picture on the parchment paper using piping gel.  Once you are done, lay the paper on top of the smoothly iced cake, with the gel side down. Press lightly and gently peel off. The entire traced outline in piping gel will superimpose onto the cake. Now, feel free to trace over the piping gel using colored icing.

Finally, the easy tip to an awesome look is Accessorize, Accessorize, and Accessorize. Put on your thinking caps and come up with innovative ideas. M & M’s can be eyes, buttons. Licorice, Sprinkles, Shredded coconut, Candies, Nuts, and Fruits are all great for decoration if they are used creatively. With a great deal of enthusiasm, a moderate amount of patience and a dash of creativity, you can create a treat for the eye and a delight for the appetite.  

Thursday, August 16, 2012

Birthday Cakes

What can be healthier than home-made cakes. You can control every ingredient you add to come up with the perfect combination of what is right for you and your family. Whether it is organic flour or all-purpose, brown eggs or eggless, butter or olive oil - you are the conductor of this orchestra. This post contains mostly home-made cake decorations. Cake recipes are soon to follow.. The biggest health advantage of home made cakes is being able to control the sugar level of the icing and what artificial stabilizers are added to the icing.
Hope you enjoy the collection and do not forget to leave your valuable comments.

Here is a collection of Birthday cakes.
Jungle Safari Cake

lion zebra waterfall giraffe rectangular cake

Cake Layout - One rectangular cake on the right. The left layered appearance is simply by cutting another rectangular cake and laying it atop the bigger piece.

Icing & Decoration
1) The animals that are upright are food safe toys made for cake decoration.
2) The animals on the cake itself are made from chocolate. (Giraffe, Hippo, Elephant)  Trace your favorite animals on parchment paper and fill with melted chocolate. This can be done with a ziploc shaped like a cone with a hole at the end ,or using decorator bags available in Micheals.
3) The grass is drawn using the three hole tip and green icing.
4) The waterfall is blue sugar sprinkle available in regular grocery stores


                                               Winnie the Pooh Cake

star decoration winnie the pooh birthday cake


The Pooh is made from a cake mould in the shape of pooh. The house is a rectangular cake and half of a round cake.
The decoration on pooh is mostly regular star tip icing.

Dora Mermaid Cake
blue waters beach dora

Madagascar Cake


Tinker Bell cake


Dora Birthday Cake


Decoration
1) The Dora picture is traced from a fancy tablecloth on parchment paper using piping gel.
2) Then lay your picture (gel side down) on top of the cake and gently press the sheet.
3) Gently peel of the parchement paper and the impression of the picture is formed on the cake. Then use your favorite colors to fill in the picture.
4) The balloons are colored candy. The tree/ strings etc is all regular butter cream icing decoration. 

Mickey Mouse cake


Minnie Mouse Cake